
Article: Koromo-gae – Converting an Old Japanese Maple to Beni Chidori
Koromo-gae – Converting an Old Japanese Maple to Beni Chidori
Koromo-gae literally means 'changing clothes' (koromo = clothes, and gae>kae>kaeru = 'to change'). In the context of bonsai, it refers to swapping the foliage or flower type of a tree. For example, a Hawthorn (Crataegus) might have all of its large-leaf foliage replaced with a smaller-leafed variety, or a Flowering Apricot (Prunus mume) might have its white-flowering branches replaced with pink-flowering branches. Here in North America we see this done most often with Junipers (Juniperus). Here is how I'm doing it with a Japanese Maple (Acer palmatum).

BACKGROUND
This tree came to my bonsai nursery in 2022. As far as plain, non-cultivar Japanese maples go, I had no complaints about this one. The shape and size of the leaves were acceptable.

Fall coloration did not disappoint

And once the leaves had fallen, it was obvious that the tree was not going to have any trouble ramifying either.


The spring foliage was disappointing, though.

WHY
There is no hiding it — this had more to do with my needs than the tree’s needs. I am one of the many people who have been lured into bonsai by the Beni Chidori maple, and having one in my garden has always been a top priority.
YEARS OF PREPARATION
Preparation is key. For 2 years I let the branches of this tree elongate, while being cautious not to let any of them overly thicken, which would compromise the design. I also reduced the ramification as much as possible while maintaining balance across the tree.
The goal was to improve light penetration to the areas where I was going to be grafting.
Preparing your skills and patience for this in advance is also very important.
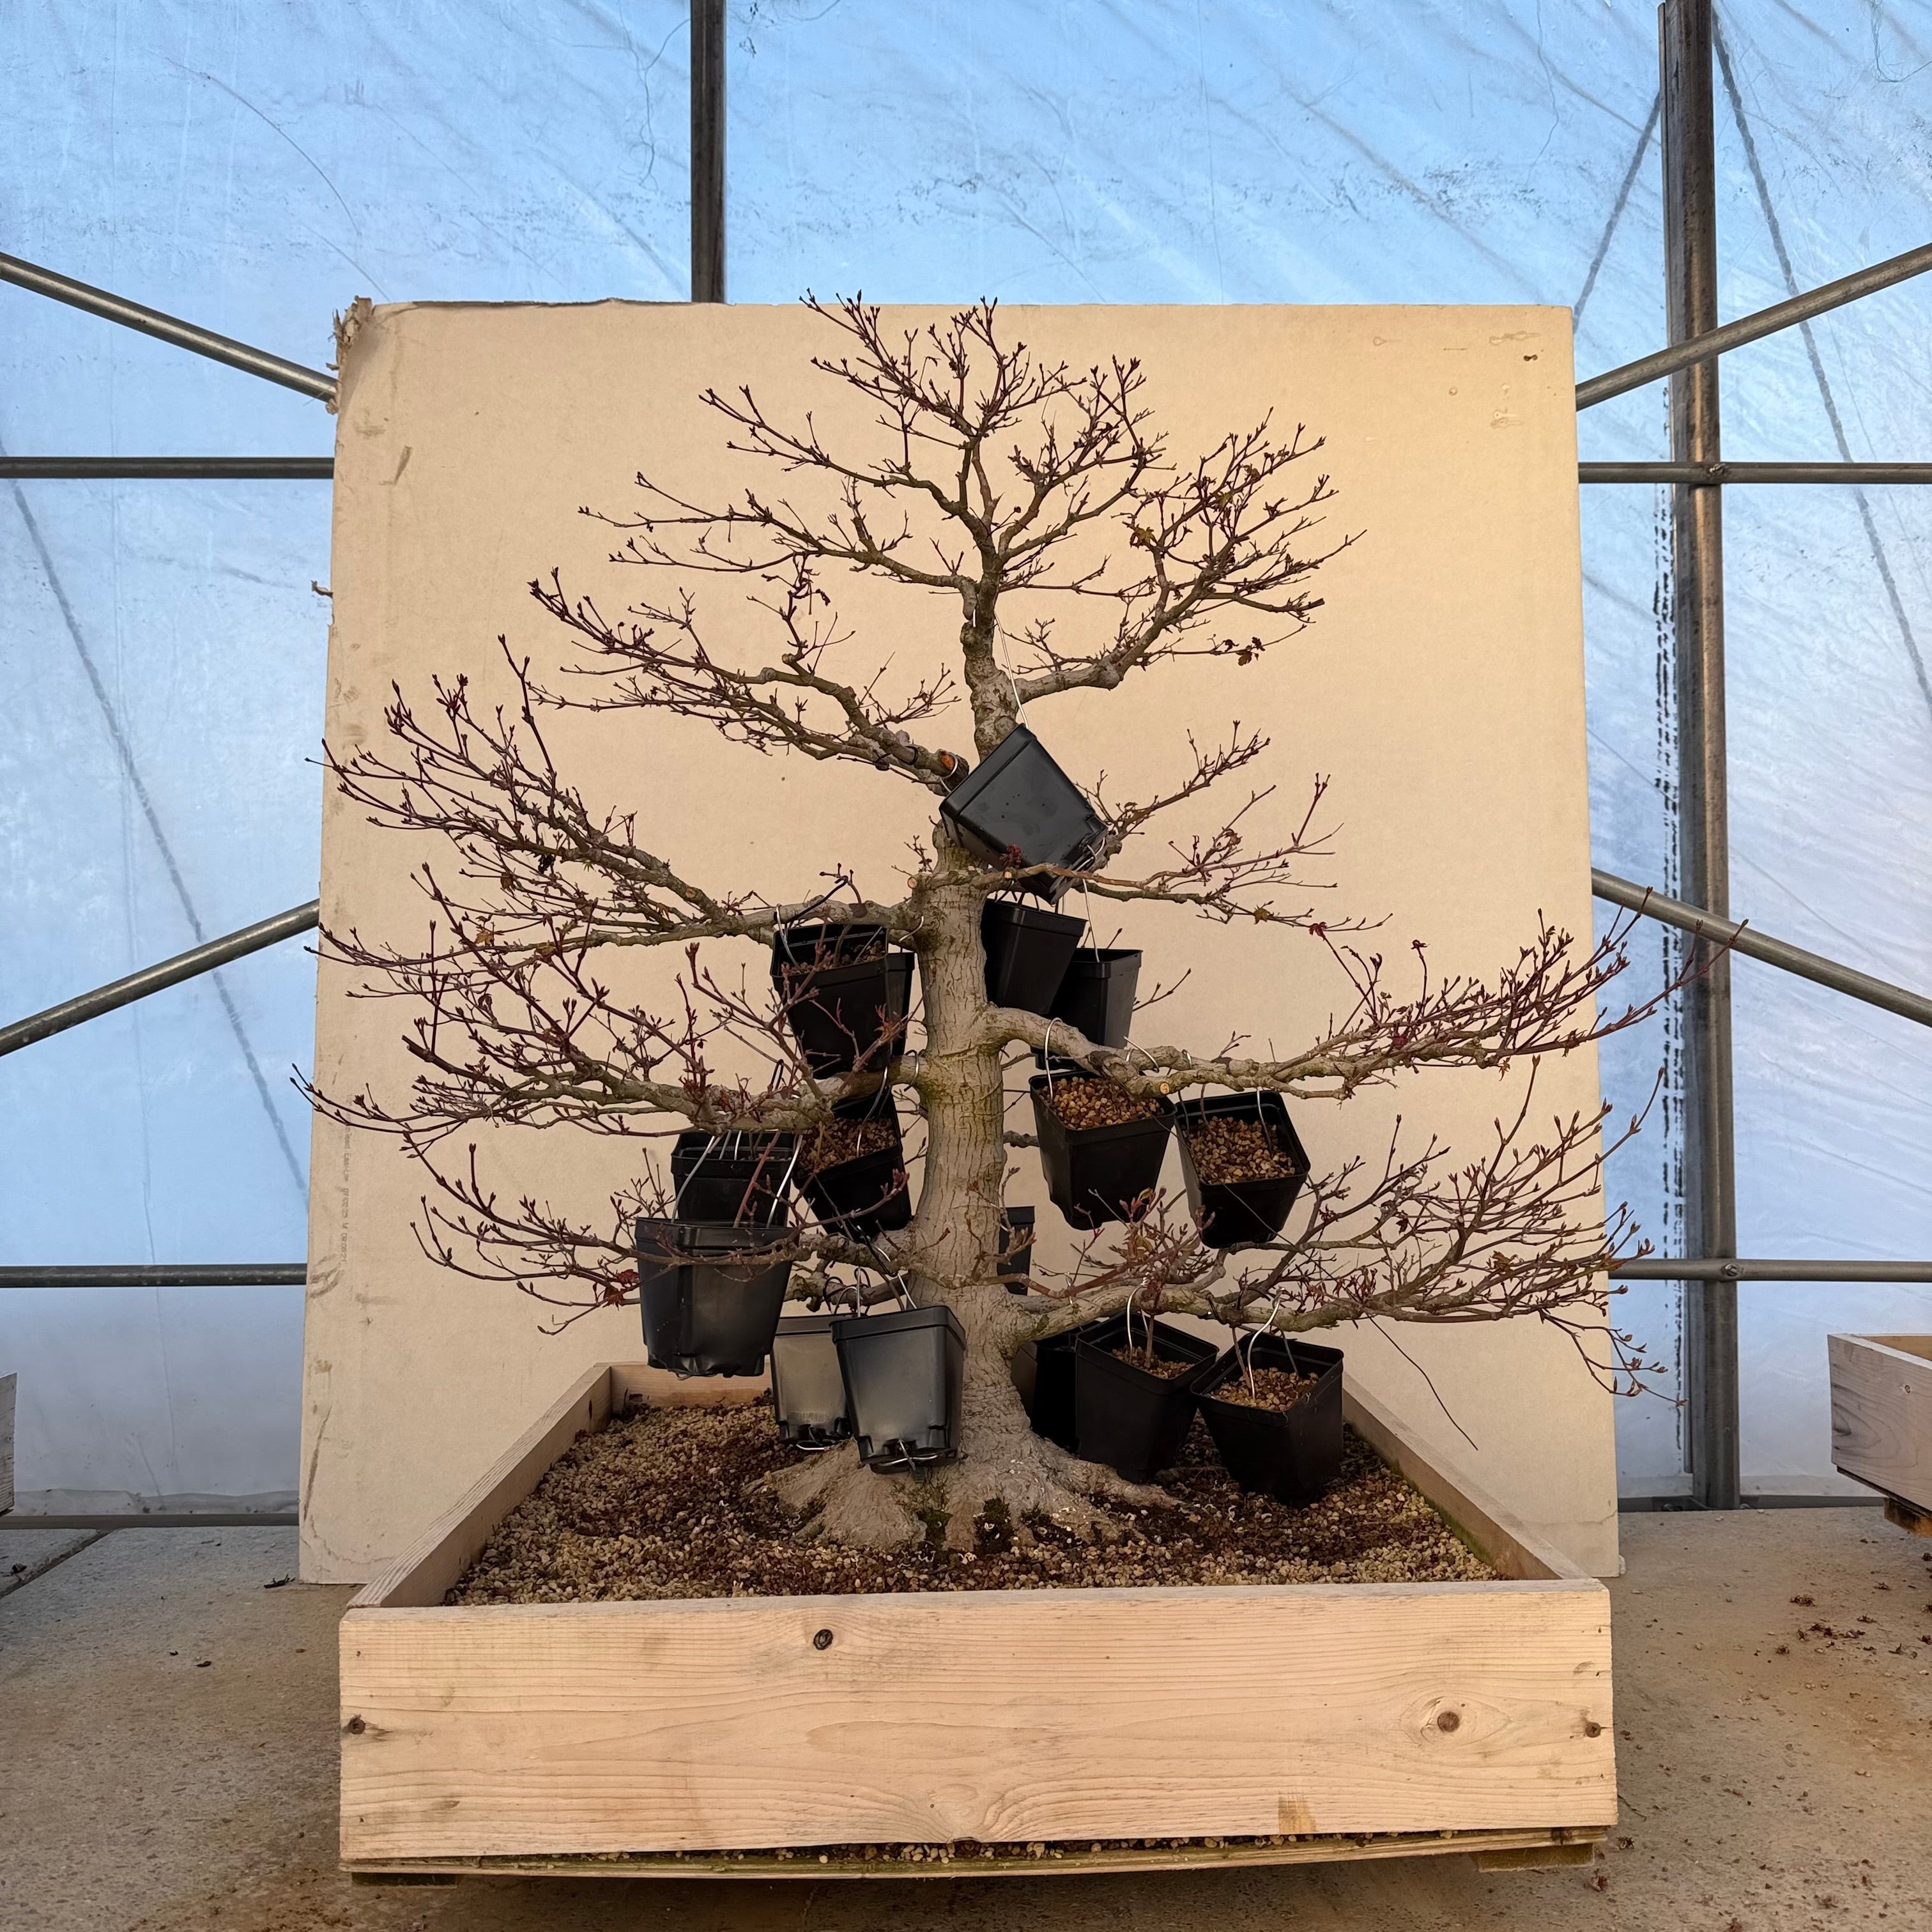
Right before grafting, the tree looked like this

PREPARING YOUR GRAFT MATERIAL
Unlike scion grafting, thread grafting requires that your donor plant be accompanied by its pot. If your donor plants are not long enough to reach the intended grafting location, suspending the donor plant’s pot is required. When suspending pots, you want them fixed in place and unmoving when challenged by heavy rain, wind, or animals. You also want to make sure that the pots are not casting shade on other intended graft locations.
There are many ways to do this, but I like using two wires per pot. One wire is used to fasten the tree in the pot. The other wire is used to suspend the pot from the tree.
Ideally, you should do this at least one year in advance to allow your donor plants to be well-rooted in their pots. This improves vigor (which shortens the length of time required for the graft to take), increases the length (but also thickness, watch out!) of your donor material, and reduces the movement of your donor plant in its pot (and therefore the movement of the graft).


Yes, I know this is not how we are taught to wire trees into pots. However, when you pot tens of thousands of trees per year, you develop preferences, and this is the way I prefer to wire in very young material for this purpose.
THIS IS NOT A DRILL
If possible, use new drill bits and get yourself good ones. It makes a difference. You need a very thin one to drill a pilot hole. Next, you need one to drill a hole that will match the diameter of your grafting material.

For the sake of caution, the total diameter of your hole should not be more than 50% of the diameter of the branch you’re drilling into.

The drill should enter from the side of the hole that your donor material will exit from.
To prevent exit-hole blowout, do not put any pressure on the drill — let the sharpness of the drill bit do the work.
Try to drill at a favorable angle for future growth, but you don’t need absolute precision here. Why? Because when inserting your donor material, you can choose to carefully locate and orient buds in your favor, in addition to wiring the branch itself.

If your drill bit is not sharp, this is what your hole will look like. This IS NOT GOOD. Your hole should be smooth, with nice, clean cuts, especially of the cambium.

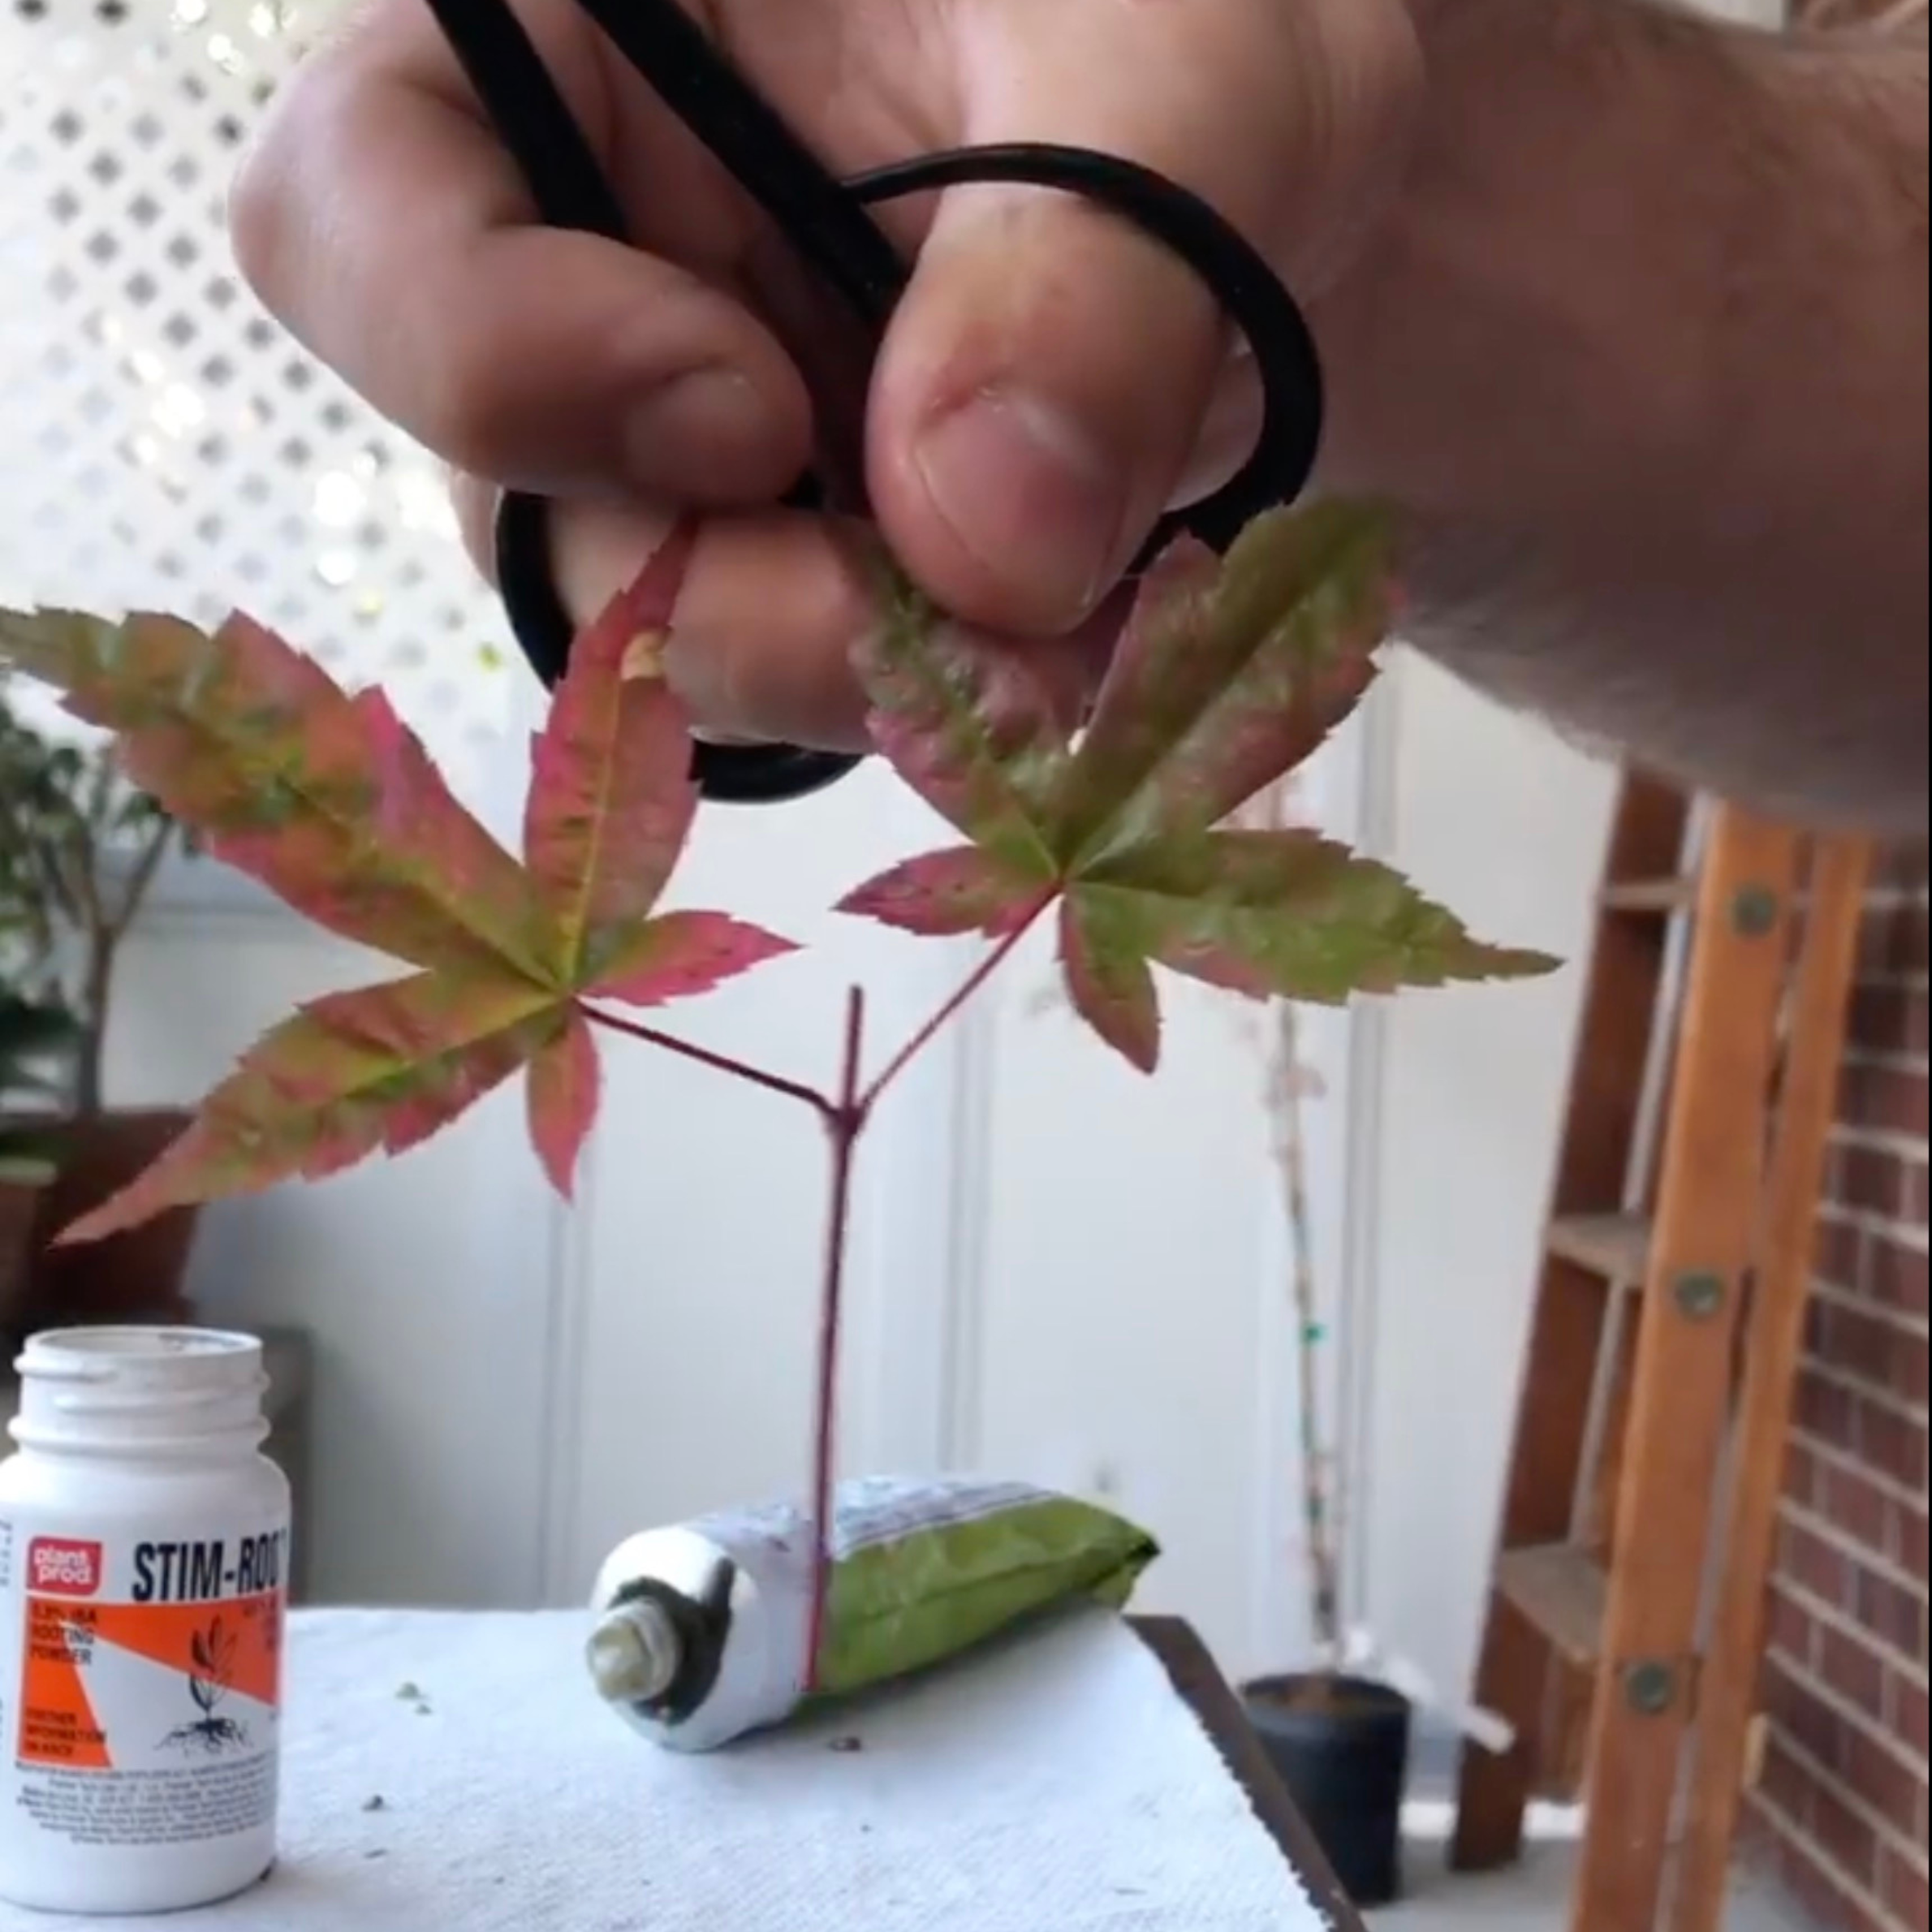
GRAFTING
Insert the donor material, carefully locating and orienting the buds. Secure the pot to reduce movement.

Some people prefer to expose the cambium of the donor material before inserting it. I prefer to insert the material, finalize its location, and then gently lift it, scrape it, and slide it back to its final resting place.

Insert bits of branches into the grafting location to reduce movement and permanently create cambium-to-cambium contact.

I like to roll the cut paste into a snake and wrap it around the neck of the donor material like a scarf. Stay warm, my friend.

I then compress it with wet fingers to seal the site. Do the same for the exit hole.

THOUGHTS
What about the apex?
The donor material will need to thicken considerably in order to match the proportions of the original branches. In order to do this, the donor branches will be allowed to lengthen A LOT. In the future, I will use those extending branches to graft into the apex — likely in February 2028 or 2029. Because the apex is generally made up of thinner branches than the branchs below, it’s fine to give the lower branches a head start.
Scar management
It’s helpful to know what the 'front' of your tree will be, and to place grafts in such a way that the scars created by this process are hidden from the main viewing angle. If done well, the scars will be minimal and well within the realm of what we see at the highest-level exhibitions.
Timeline
Let’s be clear: it will take 15 to 20 years to get this tree looking like it did before. But that’s a short-term goal in the future-life of this tree.
How old is it now? I can’t say for sure, but somewhere between 40 and 70 would be a guess. This means that it has about 60-100 years to go before it reaches the age of some of my favorite Japanese Maples. It’s funny to think that its next caretaker might not be born yet.
.%20%C2%A0In%20the%20context%20of%20bonsai,%20it%20refers%20to%20swapping%20the%20foliage%20or%20flower%20type%20of%20a%20tree.%20%C2%A0For...)